How I Built and Deployed My Website Using Next.js and Netlify
I built and deployed my personal portfolio website and blog using Next.js, Netlify, and Cloudflare. In this post I’ll take you through my decision-making process for the technologies I used, how I deployed my website with a custom domain, and what I learned along the way. By the end of this post, you should have all the tools you'll need to deploy a live website and blog.

Next.js
If you’re familiar with Javascript and React, Next.js is a good React framework to explore in developing your website. It handles certain things out of the box for us, for example the code bundling and transpiling (using webpack and Babel, respectively) that is typically required for React apps.
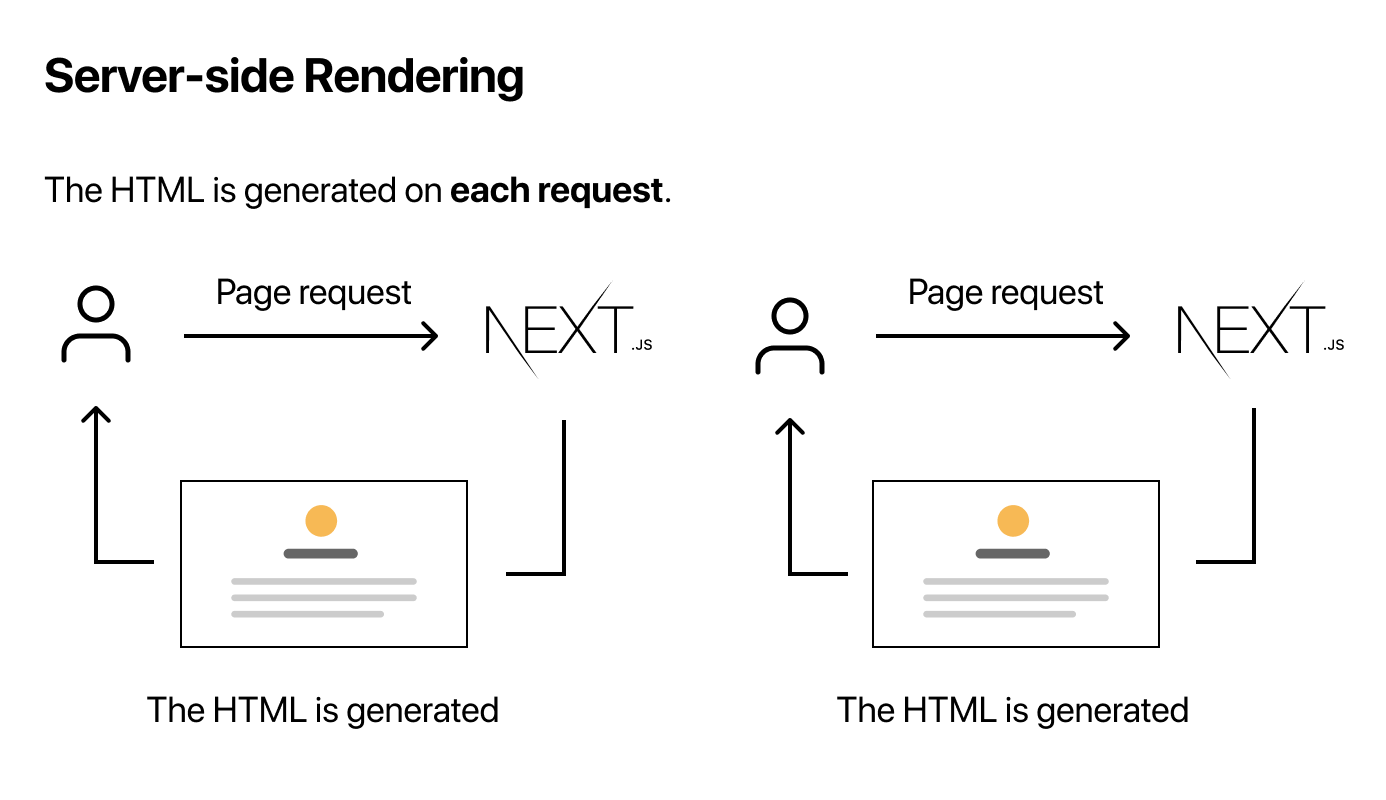
Next.js also handles pre-rendering, which means that it generates the HTML for pages in advance. This allows for better app performance because pre-rendered pages can be loaded more quickly. Both static generation (SSG) and server-side rendering are supported by Next.js.


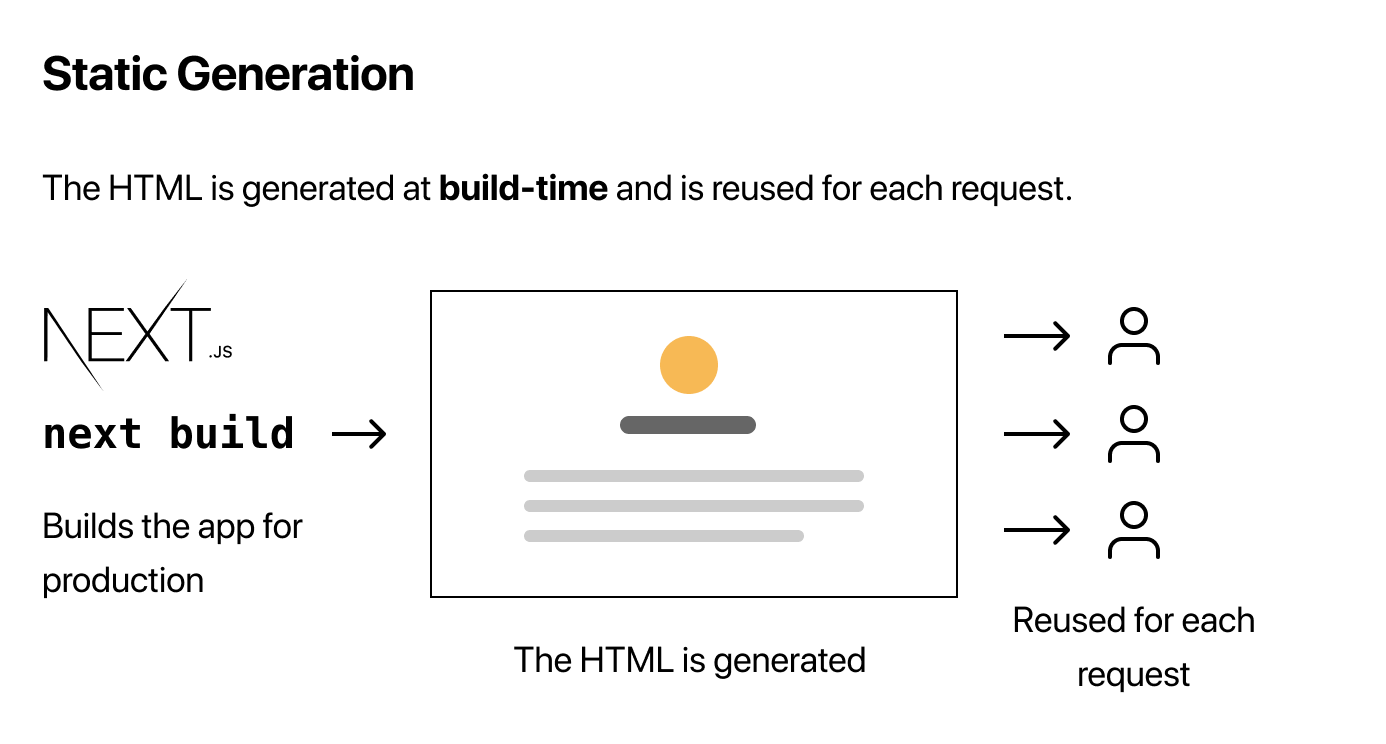
But we are primarily concerned with static generation, which is the form of pre-rendering that occurs at build time rather than upon a user's request. Because sites like the portfolio and blog we want to build serve content that does not depend on user data or interaction, we can pre-render the page ahead of time in order to make the process faster and more scalable.
Hopefully by now you can see the value of using something like Next.js. In the next section we will dive into the process of developing the site.
Developing the site
I followed the starter tutorial in the official Next.js docs (version 9.3). It's a great guide and within a few hours you will have a live site that looks something like this.
Using a React framework like Next.js forces you to structure your application a certain way. But this is required to get some cool functionality out of the box. For example, in order to create each page, you add a file under the pages directory and automatically get a route to that page. Next.js also supports dynamic routes if you choose to add brackets to a page filename, like pages/post/[postid].js.
Static generation with data in Next.js can be achieved by simply exporting an async function called getStaticProps within any page component that you wish to statically generate. In production, getStaticProps will run at build time to provide the props, or data, that is needed to generate the page.
These are the main things I noted as I went through the tutorial, but there are many more cool features you can explore yourself in the official documentation.
Deployment

Now that you have built your site, we want to deploy it. I picked Netlify because it is simple to use, has a solid free tier with all the features I needed for this project (and, honestly, because I've been wanting to try it out after hearing about it at a conference :D).
To do this, I had to make a top level file called 'netlify.toml' containing the following:
[build]
  command = "npm run build && npm run export"
  publish = "out"
The command tells Netlify to build and bundle the site. The publish sets the build directory to out, which is the default for Next.js.
Then, in package.json, under scripts and "start", add:
"export": "next export"
Next, create a Netlify account, and click "New site from Git". Follow the steps to set up your repo and click "Deploy site". Now your site will be live!
What I liked about using Netlify was how easy it was to set up continuous integration. Through the Netlify UI, I was able to easily set up my app to re-deploy upon merge to my repo's master branch. Now, any time I make changes to my site and merge on Github, the changes will be live within seconds.
Customizing the domain
By now, you should have a site hosted at [name-of-your-site].netlify.app. Because I wanted my site to point to https://reginalin.com, I needed to do some additional setup with a Domain Name Server (DNS).

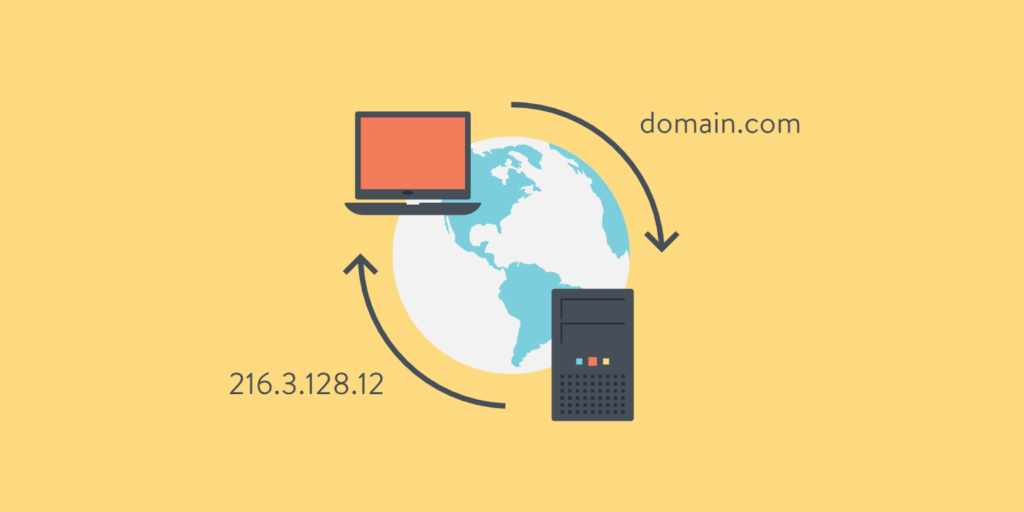
A DNS is like a phone book that converts a readable domain name like yourfunsite.com to an IP address like 70.43.111.42. In this case, I needed to point my site from https://reginalin.com to the Netlify address. (You can purchase your own custom domain off a site like GoDaddy). I picked Cloudflare as my DNS because they are branded as a privacy-first consumer DNS service. They do not use browsing data to target ads, do not write querying IP addresses to disk, and wipe all logs within 24 hours to protect user data.
Inside Cloudflare's DNS management page, add a CNAME with your Netlify site as the target and your custom domain as the name. A CNAME (stands for Canonical Name) record simply aliases one address to another.
And voila! By now, you should have a portfolio website reachable by your custom domain!
Future fun things
So, now that you have a deployed site, you can do fun things like write blog posts about developing your blog. One other fun thing I worked on next was adding Google Analytics tracking (I used a package called React-GA to do this easily). But go wild, go crazy, take it to the moon!

